Cozy Garlic Bread Rolls: A Comforting Treat for Any Occasion
There’s something truly magical about the aroma of freshly baked bread wafting through your home, isn’t there? It takes me back to my childhood, where family gatherings around the dinner table were filled with laughter, warmth, and, of course, the irresistible smell of garlic bread rolls. Whether it was a chilly evening or a gathering to celebrate a special occasion, those golden, fluffy rolls made everything just a little bit cozier.
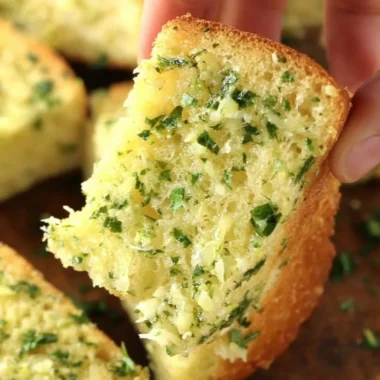
Imagine tearing into one of these warm, tender Garlic Bread Rolls, the soft interior giving way to a buttery, garlicky goodness that’s simply irresistible. Perfect for any meal, these rolls are not just an accompaniment; they are a heartwarming embrace on a plate that brings loved ones together. This is a dish you’ll want to pin for later — trust me!
Why You’ll Love This Recipe
- Easy to Make: With just a handful of simple ingredients, this is the kind of recipe that feels fancy without the fuss.
- Crowd-Pleasing Delight: Perfect for family dinners or potluck parties, these rolls are bound to be the star of any table.
- Versatile Flavor: Infused with creamy garlic and paired with fresh parsley, these rolls can complement any dish, from pasta to soups.
- Warm and Comforting: There’s nothing like the feeling of enjoying a warm roll straight from the oven, spreading more butter on top for that extra touch.
- Great for Leftovers: If you happen to have any left (which is rare!), they make for delicious sandwiches or toasted snacks the next day.
Ingredients You’ll Need for Garlic Bread Rolls
- 4 1/2 tablespoons unsalted butter
- 2 tablespoons minced garlic
- 3 1/2 cups + 1 tablespoon all-purpose flour (See notes below for measuring)
- 3 tablespoons chopped fresh parsley
- 1 tablespoon granulated sugar
- 2 1/4 teaspoons instant yeast
- 1 teaspoon fine sea salt
- 1 cup whole or 2% milk (warmed to 110°F)
- 1 large egg (room temperature)
- 1 beaten egg, for brushing the tops
- 2 tablespoons unsalted butter (for garlic butter)
- 1 tablespoon minced garlic (for garlic butter)
- 1 tablespoon chopped fresh parsley (for garlic butter)
- Flaky sea salt (for finishing)
How to Make Garlic Bread Rolls
- Lightly butter the bottom and sides of a 9×13 pan and set it aside.
- In a small pot, melt 4 1/2 tablespoons of unsalted butter and add 2 tablespoons of minced garlic. Cook for 1-2 minutes or until the garlic is fragrant. Take off the heat and let cool while you measure the other ingredients.
- In a stand mixing bowl, combine 3 1/2 cups + 1 tablespoon of all-purpose flour, 3 tablespoons of chopped fresh parsley, 1 tablespoon of granulated sugar, 2 1/4 teaspoons of instant yeast, and 1 teaspoon of fine sea salt. Then, add the warmed milk, 1 large egg, and the cooled garlic butter mixture.
- Knead on low speed with the dough hook until the dough looks smooth and feels soft and tacky, about 10-12 minutes. If the dough is too sticky, add one tablespoon of flour at a time until you have a workable dough.
- Cut the kneaded dough into 12 equal portions (use a scale for accuracy – about 67 grams each). Shape each piece into a smooth ball with your hand, pinching the bottom where the seam comes together to keep it tight.
- Place the shaped dough balls into the prepared baking pan. Cover with plastic wrap or a clean kitchen towel and set them in a warm place to rise until doubled in size, about 1-2 hours. (Watch the video below for visual aid!)
- Preheat the oven to 350°F (180°C).
- Brush the tops of the rolls with the beaten egg wash. Then bake for 20-30 minutes, or until the tops are golden brown.
- While the rolls are baking, prepare the garlic butter by melting 2 tablespoons of butter in a pot, adding 1 tablespoon of minced garlic, and cooking for 1-2 minutes until fragrant. Stir in 1 tablespoon of chopped fresh parsley.
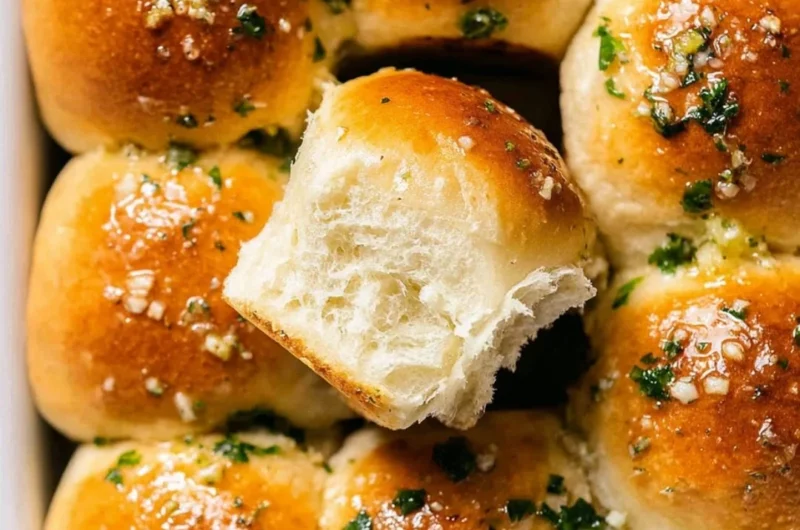
- When the rolls come out of the oven, immediately brush them with the garlic butter mixture. Sprinkle with flaky sea salt if desired and serve warm!
Fun Ways to Customize It
- Cheesy Garlic Rolls: Add shredded mozzarella or cheddar cheese to the dough for a rich, gooey surprise in every bite.
- Herbed Garlic Rolls: Try mixing in different herbs like rosemary or thyme for a fragrant twist that beautifully complements the garlic.
- Spicy Kick: Add a pinch of red pepper flakes to the garlic butter for those who enjoy a bit of heat.
- Sweet Garlic Rolls: Drizzle a little honey or maple syrup over the warm rolls right before serving for a unique sweet-savory experience.
Chef Emma’s Helpful Tips
- Make-Ahead Advice: You can prepare the dough in advance; after kneading, place it in the fridge overnight. Allow it to come to room temperature before shaping and rising.
- Ingredient Swaps: Don’t have all-purpose flour? Try using bread flour for a slightly chewier texture. You can also switch the butter for olive oil for a lighter flavor.
- Slicing Tips: For beautiful, even rolls, use a sharp knife or a dough scraper to slice the dough instead of tearing it.
- Storage Suggestions: These rolls keep well in an airtight container at room temperature for up to three days, or you can freeze them for longer storage. Just reheat in the oven when you’re ready to enjoy them again.
What’s Inside – Nutrition Breakdown
- Serving Size: 1 roll
- Calories: 180
- Total Fat: 7g
- Saturated Fat: 4g
- Carbohydrates: 24g
- Sugar: 1g
- Protein: 4g
- Sodium: 150mg
Frequently Asked Questions
Can I make this ahead?
Absolutely! Prepare the dough and let it rise, then refrigerate it overnight. Shape it the next day before the final rise and baking.
Can I use different ingredients?
Yes! Feel free to swap ingredients based on what you have; for instance, you can use non-dairy milk or alternative herbs.
How do I store leftovers?
Store any leftover rolls in an airtight container at room temperature. They also freeze well for up to 3 months.
How long does it last?
These rolls are best enjoyed fresh but can last 2-3 days at room temperature and a bit longer if frozen.
A Cozy Closing Note
These Garlic Bread Rolls are more than just a recipe; they’re an invitation to gather around the table with friends and family, sharing warmth and stories. Whether it’s a cozy weeknight dinner, a festive gathering, or simply a treat for yourself, they’re sure to bring a smile to everyone’s face. Save this recipe for your favorite cozy meal planning board so it’s at your fingertips when the craving hits! Happy baking!