
A Cozy Treat: No-Bake Oreo Cheesecakes
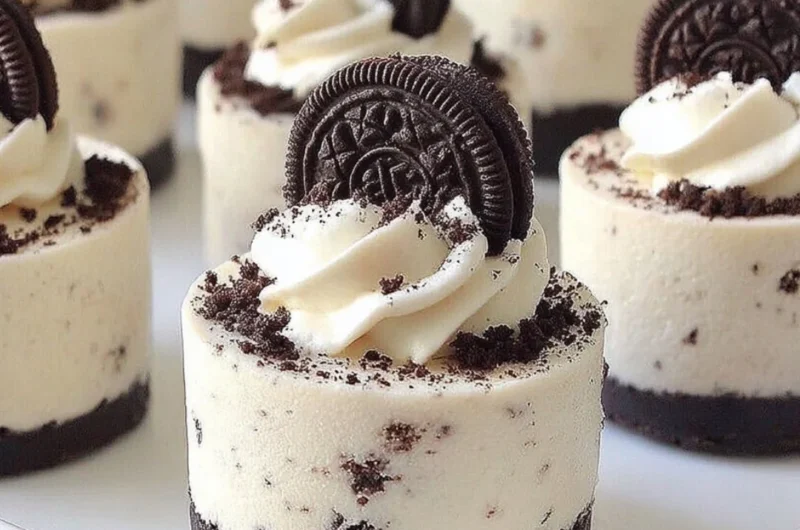
As the cool wind rustles through the trees and the days grow shorter, I find myself longing for simple pleasures that wrap me in warmth and comfort. One of my favorites? A delightful dessert that whisks me back to my childhood—No-Bake Oreo Cheesecakes. There’s something incredibly satisfying about the crisp snap of an Oreo, the creamy fullness of cheesecake, and the puffiness of whipped cream, all nestled together in a charming little cup. This combination creates a treat that feels both indulgent and nostalgic.
Making these delightful cheesecakes is not only quick and easy, but it’s also a fun activity to share with loved ones. Whether you need a sweet pick-me-up for family movie night or a dessert for a gathering, these easy no-bake Oreo cheesecakes are high on the list for satisfying cozy sweetness. Trust me; this is one you’ll definitely want to pin for later!
Why You’ll Love This Recipe
- No Baking Required: Perfect for those days when you want a sweet treat without turning on the oven.
- Quick and Easy: You can whip this up in no time; it’s an ideal recipe for busy weeknights.
- Crowd-Pleasing: With their creamy texture and familiar flavor, these are a hit at parties and gatherings.
- Endlessly Customizable: Mix in your favorite flavors and toppings to make this recipe truly your own.
- Perfect Portions: Serve them in individual cups for a delightful dessert experience that feels special and personal.
Ingredients You’ll Need for No-Bake Oreo Cheesecakes
Gather these simple ingredients to create your cozy no-bake delights:
- 16 Oreo biscuits
- 8 oz cream cheese (softened)
- 1/2 cup powdered sugar
- 1 cup whipped cream
- Additional cookie crumbles for topping
Step-by-Step Instructions
Let’s make it together! Follow these simple steps to create your No-Bake Oreo Cheesecakes:
Prepare the Base: Start by crushing the Oreo biscuits. I like to use a rolling pin or a food processor to get them nice and fine. Press the crumb mixture into the bottom of serving cups to form a sturdy base.
Make the Cheesecake Filling: In a mixing bowl, combine the softened cream cheese, powdered sugar, and about half a cup of the whipped cream. Use a hand mixer or a spatula to mix until the filling is smooth and creamy—just absolutely heavenly!
Layer the Delights: Spoon the luscious cheesecake filling over the Oreo base in each cup. Make sure to fill it generously!
Add the Finishing Touches: Top each cup with a dollop of whipped cream, and sprinkle some cookie crumbles on top for that extra crunch.
Chill and Enjoy: Refrigerate your cheesecakes for at least 2 hours (or longer if you can wait!). This allows all those incredible flavors to meld together beautifully.
Fun Ways to Customize It
Looking to add a twist to your No-Bake Oreo Cheesecakes? Here are some creative variations to try:
Mint Chocolate Chip: Add a few drops of peppermint extract to the cheesecake filling and sprinkle with mint chocolate or crushed mints for a refreshing bite.
Peanut Butter Delight: Swirl in a bit of creamy peanut butter into the filling for an indulgently nutty flavor. Top with chopped peanuts for a crunchy finish.
Berry Bliss: Fold in some crushed strawberries or blueberries into the cheesecake mix for a zesty and fruity twist!
Chocolate Drizzle: Once set, drizzle melted chocolate over the top for an extra touch of sweetness and elegance.
Chef Emma’s Helpful Tips
Here are a few tips to ensure your No-Bake Oreo Cheesecakes turn out perfectly every time:
Make-Ahead Magic: These cheesecakes can be made a day in advance. Just cover them with plastic wrap before refrigerating—easy peasy!
Ingredient Swaps: If you’re out of cream cheese, try using mascarpone or even Greek yogurt for a lighter alternative.
Slicing Tricks: If you ever want to serve these in a pie dish instead, make sure to let them set a bit longer for easier slicing.
Storage Suggestions: Store any leftovers in the refrigerator, covered, for up to 3 days. Just be mindful, they may not have quite the same dreamy texture on day three.
What’s Inside – Nutrition Breakdown
Here’s a quick look at the nutrition information per serving (for one cup):
- Serving Size: 1 cup
- Calories: 300
- Carbohydrates: 34g
- Sugar: 18g
- Fat: 18g
- Protein: 4g
- Sodium: 200mg
Frequently Asked Questions
Can I make this ahead?
Absolutely! These cheesecakes are perfect for making ahead of time and storing in the fridge.
Can I use different ingredients?
Yes! Feel free to experiment with different cookie bases or cream cheese alternatives according to your preferences.
How do I store leftovers?
Keep any leftovers covered in the refrigerator for 2-3 days. Just remember—they get softer over time due to the whipped cream.
How long does it last?
These treats are best enjoyed within 3 days of making, but they’re so delicious, they usually don’t last that long!
A Cozy Closing Note
There’s something truly special about making a treat that evokes comfort and warmth, especially while surrounded by family or friends. These No-Bake Oreo Cheesecakes offer just that—a cozy, creamy sweetness that fills your heart and home with joy.
So go ahead—save this No-Bake Oreo Cheesecake recipe to your dessert board so it’s ready when you need a cozy treat. Let’s make sweet memories together, one delightful bite at a time!
Print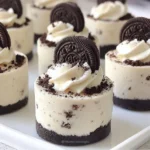
No-Bake Oreo Cheesecakes
- Total Time: 135 minutes
- Yield: 4 servings 1x
- Diet: Vegetarian
Description
Indulge in these creamy, nostalgic No-Bake Oreo Cheesecakes topped with whipped cream and cookie crumbles for a delightful treat.
Ingredients
- 16 Oreo biscuits
- 8 oz cream cheese (softened)
- 1/2 cup powdered sugar
- 1 cup whipped cream
- Additional cookie crumbles for topping
Instructions
- Prepare the base: Start by crushing the Oreo biscuits. Press the crumb mixture into the bottom of serving cups to form a sturdy base.
- Make the cheesecake filling: In a mixing bowl, combine the softened cream cheese, powdered sugar, and half a cup of the whipped cream. Mix until smooth and creamy.
- Layer the delights: Spoon the cheesecake filling over the Oreo base in each cup, filling generously.
- Add the finishing touches: Top each cup with a dollop of whipped cream and sprinkle cookie crumbles on top.
- Chill and enjoy: Refrigerate your cheesecakes for at least 120 minutes to meld the flavors.
Notes
These cheesecakes can be made a day in advance. Swap cream cheese with mascarpone or Greek yogurt for a lighter option.
- Prep Time: 15 minutes
- Cook Time: 0 minutes
- Category: Dessert
- Method: No Bake
- Cuisine: American
Nutrition
- Serving Size: 1 cup
- Calories: 300
- Sugar: 18g
- Sodium: 200mg
- Fat: 18g
- Saturated Fat: 10g
- Unsaturated Fat: 6g
- Trans Fat: 0g
- Carbohydrates: 34g
- Fiber: 1g
- Protein: 4g
- Cholesterol: 25mg


